Monday, May 6, 2013

My Fridge Work Station and a Chevron Tutorial

Can I get a big hip-hip hooray that i'm out of my first trimester and wanting to nest?! I may have cooked one meal over a 6 week period. I couldn't even go to the grocery store, couldn't clean the shower or the toilets, let alone do anything creative. I am so happy to be in my second trimester. I love nesting and i am gradually getting my house ready for transitioning to a bigger family. We are so excited to find out if it's a boy or girl in a few weeks!
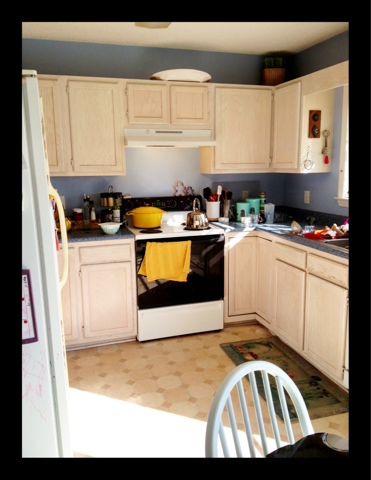
I decided I want to have a separate nursery for the baby. I want to make it his or hers. Lucy is about to get into a big girl bed (oh my gaaa!!) and so right now I have a guest bedroom/office that i need to turn into a nursery. First of all, I never use the desk back in the office. it just collects clutter. I decided I wanted and needed a little organization grand central station. There is a little nook by my fridge that was not really being used. So I put the desk there, it's a tad bit longer than the fridge, but only an inch or 2. It will do for now!

So I decided to use the fridge like a wall and decided on cork tiles with magnets on the back. Found these in Pinterest for inspiration:


I love those cute spice tins. That's on the find list! And so the cork tiles. At first I was thinking of covering the tiles in fabric or ribbon. On my way to Michaels I thought to paint chevron!! I've got a whole wall of chevron in my bathroom and I wanted to bring it somewhere else. Plus paint is cheaper than ribbon and fabric! So with my 40% off coupon I spent $8 on a bottle of teal acrylic paint (of course it has to be teal!), a pack of 4 cork tiles and a foam paint brush which worked great on the cork. I already had magnets. The strips are working great!

Okay... Chevron is tricky. Every point has to be a right angle or the whole thing can be thrown off. It took us 2 days to get it right in the bathroom! I tried a few different ways, luckily I had one tile already I could practice.

Here's what you'll need:


I didn't use the tape. I used the L shaped ruler, I'm sure there's a name for it, to make my template. I went 2 1/2 inches down each side. I traced it on a piece of poster board and then began tracing away. i used a pen and i like how the chevron has a subtle border.


You can work up or across. Then start painting!


I wanted to originally paint chevron on just 2 and then a different pattern on the other 2...but I loved the chevron so much that I painted all of them! Then I wanted to make sure they matched so I lined then up to trace the next!


Then for the bottom, I lined them up vertically.


Ta-Daaaaaa!!!!!!


I'm not quite finished but it definitely looks a lot more like a little work station! And a great place to plan my next project! I LOVE IT.

Sunday, March 17, 2013

Dresser

My apologies for my lack of posts! I have been busy and in my first trimester of pregnancy, so you know how that goes! I finally decided that I needed a project to take my focus off how bad I've been feeling! I had everything I needed to paint the dresser in my room so this project didn't cost me a dime. I had a half gallon of white paint left over from when I painted my kitchen table and a couple sanding blocks.

I am so bad at taking before pictures! I get so excited to get the project started I just don't think! But you can get an idea of what it looked like before. It's an older dresser with beautiful details, details that you really see better with paint! I used Behr (the best paint in the universe) Interior Paint in semi-gloss in Polar Bear White.


 The First thing I did was lightly sand the dresser and remove the hardware. I think it is always smart to sand furniture a little bit so the wood will absorb the paint. I did this inside since I wasn't doing heavy sanding. Just throw a sheet under the dresser. This dresser has wheels so I could just roll it where I wanted it:) After Sanding I wiped it down well with a towel. Now for the paint! It took a me three coats plus a touch up. 

Then I used a small paint brush to get around the key hole because I couldn't actually remove it from the dresser!


Now for the fun part! Distressing it! Once the paint dried, I just took my sanding block and went to town. This was easier then I thought. It didn't take much to expose the wood. It was more difficult to sand the flat surfaces, but I didn't really want to distress a ton. I just took it to the edges and ribbed section. 


Ta-da!!


I LOVE how it turned out. 


Happy Spring! I hope you all are well and feeling inspired.

Love,

Jenny

Monday, February 4, 2013

Kitchen face lift: Progress

I was driving home from the gym Saturday and was thinking about my kitchen. There all these things I'd love to do in there but one thing was getting in the way: the wall color--periwinkle blue, as pictured below.


I've put up with it since we moved in and I had enough...I texted Ben, who was working,"would it be crazy if I painted the kitchen?" He wrote back, "you are crazy!" I was already at Home Depot!


On my way to Home Depot I stopped at Benjamin Moore to get a few swatches of grays...nothing holds a candle to Benjamin Moore colors, and nothing holds a candle to behr paint and primer..it is the best!


I went with bm's "platinum gray." It wasn't too dark or too light. I have some blue countertops going on so things needed to be neutralized. And get this...I painted the entire kitchen--2 coats--with a quart of paint! That's right Home Depot lady--in yo face. How did I do it? With lots of prayer and my mad paintin skills.


I love it and now my other project looks lovely up against my pretty gray wall... My coffee bar!
Ben and I LOVE coffee. I also don't have much counter space do I was excited to free up the clutter and create a little nook. Ben loves it:) the wall behind my kitchen table was blank for so long...I had no idea what to do with it..but it gradually came together. Thanks to my mom and grandmother for finding that awesome yellow buffet! Old window and chalkboard paint makes a great way to display the menu for the week. White plates from the thrift store and art from Marshall's on clearance for $7 makes very cool wall behind the kitchen table..


You can see the gray wall color a little better in the above picture. It was hard capturing with all the light, I need to make curtains! I cannot wait to make them..


Monday, January 14, 2013

A Simply, Yet Artful Way to Display You 2013 Resolutions


I found my inspiration for this project from this Post from one of my favorite blogs, www.gracefullmama.com. I found it in July and pinned it so I would remember to do it in January. This is such an easy project! This is a great way to keep your resolutions in sight, when it is so easy to lose sight of those words God gives you throughout the year. I put my display on my kitchen table, around a candle.

This year I hope to find new strength inwardly as we endure and persevere through seasons of challenges. Honestly, last year had its challenges so I believe I will see the strength from enduring rise to the surface this year. I hope to blog and write more. I hope to develop a deeper heart connection, more intimacy, with Jesus. 


I want to Play more this year--with my beautiful daughter and fun husband! I am also venturing into some other avenues of fun that I will share later...Along with Playing I want to also REST. I want rest to be a daily thing for all of us. I have never been much of a yoga person, but I took a class recently and found it to be very restful.

I feel I will stretch myself to new lengths this year, step out in new ways! I also feel there will be a grace for all of us this year to experience the desires of our hearts. Another resolution I have is to Capture moments by not just storing pictures on the computer but by making photo books and putting pictures in frames!


I bought the rocks at the dollar store! How do you keep track of your resolutions?

Friday, January 11, 2013

Dream

After doing Riley's room I noticed the letters I used for his reading nook and gallery wall....


Could also spell DREAM! I thought this would be a great word to go over our amazing DIY Headboard


Cardboard letters are a great way to recycle diaper boxes! This was such an easy project. It literally took me 30 minutes.  I traced the letters on the box, and was so happy the "E" fit :)


I used a box cutter and utility scissors to do the job. If you use box cutters, make sure you put something under whatever you are cutting. I used another piece of cardboard :)

Then I found this Chatreuse Green paint leftover from my awesome Guest Bathroom Makeover! I love doing a project where I have everything I need. No money spent. No going to the store. It took like 2 seconds to dry and then I just placed this on top of the headboard. Ta-da!


Sweet Dreams ;)


Thursday, January 10, 2013

Feng. Shui.

January is a month of sprucing things up around here in the Cookson household, and I'm sure many other households! We started a tradition around here last year widely known as "Feng Shui." Go ahead and say it a few times. It's a fun word to say. Well it is founded in Chinese Astronomy and is popular with interior design in setting up rooms to create a more simplified living atmosphere. Ben and I's definition is "get rid of all the crap we aren't using that is taking up space and causing clutter and stress in our home." :) FENG SHUI! Ben says as he throws a shirt out of his closet into a pile. It's quite fun.

My mom, known now as "GiGi," came into town recently and brought me some dressers she found with my grandmother. They are awesome. I will be painting two of them that I will be posting! They are old and needed some drawer liner. she also bought Lucy a Pink Bike helmet that Lucy loves..


Since it's Feng Shui time around here, it is nice to return the clothes you are keeping to pretty, organized drawers. I found a ginormous (can't believe that is actually a word!) roll of wall paper at the thrift store. It's very pretty, and neutral so Ben would't mind it in his drawers. I don't think he would mind pink flowers either. In fact...I don't think he cares that much about drawer liner...But I do! I'd say I got a good deal on it.


I Measured the drawers with measuring tape. At first, I just measured it from the top opening of the drawer, but once I tried putting the paper down it was too big. So then I measured right up against the bottom and got a more accurate measurement. Then I used a yard stick and with a pen traced my cut out, to get straight lines! Then I took my handy spray adhesive and sprayed the back of the paper and the drawer itself.

VOILA! So pretty.


Look at how my mom kept Lucy occupied while we shopped. Hilarious. 


Back to the drawers. I found a 8 pack of these pretty Fragrance Sachets at Marshalls for $3.99.
Now they don't have that wood smell.

I even organized Ben's undershirts by color...We will see how long this lasts. This is day 4! Pretty good I'd say:) Go ahead, FENG SHUI!